How to Remove the Background from a Photo: A Definitive Guide to Perfect Background Scenes
Discover the power of a reliable background remover to enhance your photos. In this step-by-step guide, we'll show you how to achieve flawless background removal using PhotoScissors, the ultimate tool for creating stunning images.
Meet the Enemy: Poor Backgrounds
Unwanted backgrounds can ruin an otherwise perfect photo. Whether it's casual objects, inappropriate backdrops, or distracting elements, a subpar background doesn't belong in a professional portrait. Learn how to effortlessly remove backgrounds and elevate your photography.
Step 1: Get PhotoScissors for Windows & Mac
Don't worry about complex photo retouching software. With PhotoScissors, you can achieve professional-level results without the steep learning curve. Download PhotoScissors Desktop version and take the first step towards flawless background removal.
Step 2: Open and Edit your Photo
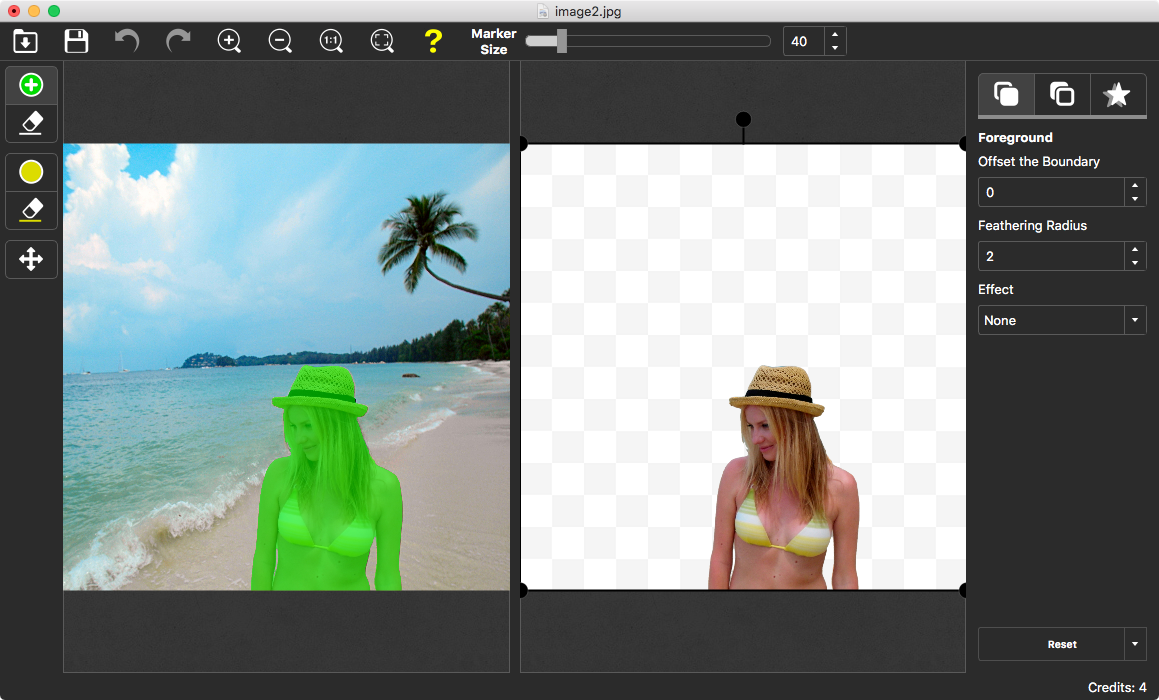
Once you open your image in PhotoScissors, witness the magic unfold as the background is automatically removed. The real-time preview in the right window lets you see the immediate results. Take a look at the transformed image:
Step 3: Refine with Precision
Although PhotoScissors utilizes advanced deep neural networks, refining the selection may be necessary if the foreground detection isn't perfect. Use a more precise marker, adjusting its size, to add or remove areas as needed. Stay within the object's lines to ensure accuracy. Remember, marking areas outside the foreground with a green marker can unintentionally remove parts of the background.
Enjoy the Impeccable Result!
PhotoScissors applies the changes instantly, providing you with immediate satisfaction. Once you're pleased with the final result, save it as a PNG (with transparency) or JPEG (without transparency) image. PhotoScissors also supports other popular picture formats to suit your needs.
With PhotoScissors, removing backgrounds from your photos takes just a matter of seconds. Unlock the full potential of your images with ease and precision. Start using PhotoScissors today and witness the difference it makes.
Customer Feedback:
For about a month I have been looking for a program that will remove the background from images. I tried Photoscissors and I was very impressed by how easy it is to use this program and get professional results. This is the program I have been looking for.
Doug